本博客使用了Hugo+Github的方法进行博客搭建,博客的搭建日期为2024-10-01,本文首次更新日期为2024-10-01,下面将详细介绍本博客的搭建方法。
Hugo的搭建
1.1 hugo的下载
-
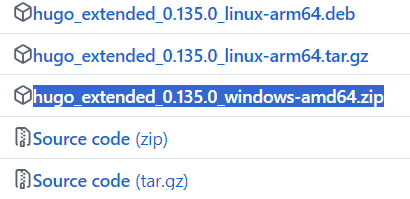
进入Hugo下载地址网址选择最新的版本,当前最新版本为:v0.135.0,点击进入
-
windows环境:选择 hugo_extended_0.135.0_windows-amd64.zip,进行下载,并解压。
1.2 创建博客
-
在解压后得到的文件的目录下进入命令行窗口,输入
hugo new site xxxx(xxxx写文件的名字,自己取即可)以创建hugo文件 -
将解压得到的hugo.exe复制到创建好的hugo文件中,然后输入
cd xxxx切换目录
1.3 配置主题
-
前往Hugo Themes,挑选喜欢的主图,进行下载,这里我选用了stack主题
-
以Stack主题为例,将下载好的主题解压,放到
xxxx/themes文件夹下 -
将
exampleSite文件夹下的content文件夹以及hugo.yaml文件,复制到主文件夹下(即前面的xxxx,后面都为主文件夹),并删除掉hugo.toml和content/post/rich-content -
修改hugo.yaml中的theme配置,将其修改为与主题的文件夹名一致,或者反过来修改主题文件夹名,只要保证两者一致即可。
-
在命令行中键入
hugo server -D,启动hugo服务,查看主题,具体的主题配置修改hugo.yaml即可,详情可看 Hugo 主题 Stack (中文)(非官方)或者Hugo 主题 Stack(官方)
Github搭建
此处需要git和GitHub账号,可自行在网上查找如何配置
2.1 静态界面部署
-
进入GitHub,创建仓库**{github用户名}.github.io**,并设置为public
-
前往Setting -> Pages -> Branch选择main分支,然后保存,会自动开启https://{github用户名}.github.io的地址,该地址即博客地址
-
修改hugo.yaml的baseurl为https://{github用户名}.github.io
-
在主文件夹下进入命令行,键入huge -D,会生成public静态资源文件夹
-
在public下进入命令行,依次执行如下命令,将资源上传到Github中,下面的命令在你的Github创建成功仓库的界面有,直接复制即可(第二条命令要与下面的一致)
1
2
3
4
5
6
git init git add . git commit -m "first commit" git branch -M main git remote add origin {你的github仓库地址} git push -u origin main -
上传成功后即可访问https://{github用户名}.github.io,查看自己的博客
2.2 hugo部署(实现Github Action自动部署)
-
在Github中创建一个新的仓库,存放hugo主文件,此处设置为private即可
-
前往
Setttings -> Developer Settings -> Personal access tokens,创建一个token(classic),有效期选择永久,(否则失效后需要重新配置,但是若为了安全,可以自行选择),勾选repo和workflow,创建。 -
将生成的token,保存在仓库的变量中,进入刚刚创建的仓库,前往
Settings -> Secrets and variables -> Actions中设置 -
在hugo主文件创建一个
.github/workflows/xxxx.yaml文件,将以下内容复制进去,想具体了解更多,可查看Github Action文档1 2 3 4 5 6 7 8 9 10 11 12 13 14 15 16 17 18 19 20 21 22 23 24 25 26 27 28 29 30 31 32 33 34name: deploy # 代码提交到main分支时触发github action on: push: branches: - main jobs: deploy: runs-on: ubuntu-latest steps: - name: Checkout uses: actions/checkout@v4 with: fetch-depth: 0 - name: Setup Hugo uses: peaceiris/actions-hugo@v3 with: hugo-version: "latest" extended: true - name: Build Web run: hugo -D - name: Deploy Web uses: peaceiris/actions-gh-pages@v4 with: PERSONAL_TOKEN: ${{ secrets.你的token变量名 }} EXTERNAL_REPOSITORY: 你的github名/你的仓库名 PUBLISH_BRANCH: main PUBLISH_DIR: ./public commit_message: auto deploy -
在hugo主文件创建
.gitignore文件,来避免提交不必要的文件 -
将hugo的主文件上传到仓库,上传成功后会触发Github Action,来自动部署你的静态页面
1
2
3
4
5
6
git init git add . git commit -m "first commit" git branch -M main git remote add origin {你的github仓库地址} git push -u origin main -
以后修改了文件后就无需输入上述这么多命令,在主文件夹下进入命令行,输入如下命令即可,有时候git push失败可以多试几次
1
2
3
git add . git commit -m "update" git push